查域名
查whois

 管理中心
管理中心

1.Download the Nginx type SSL certificate from this site and unzip it:

2.Log in to the CentOS7.x system, create a certificate directory, and upload the certificate file to the certificate directory.

3.Modify the Nginx configuration file.

Press the i key to enter the edit mode, find the server attribute configuration in nginx.conf, and delete the front #
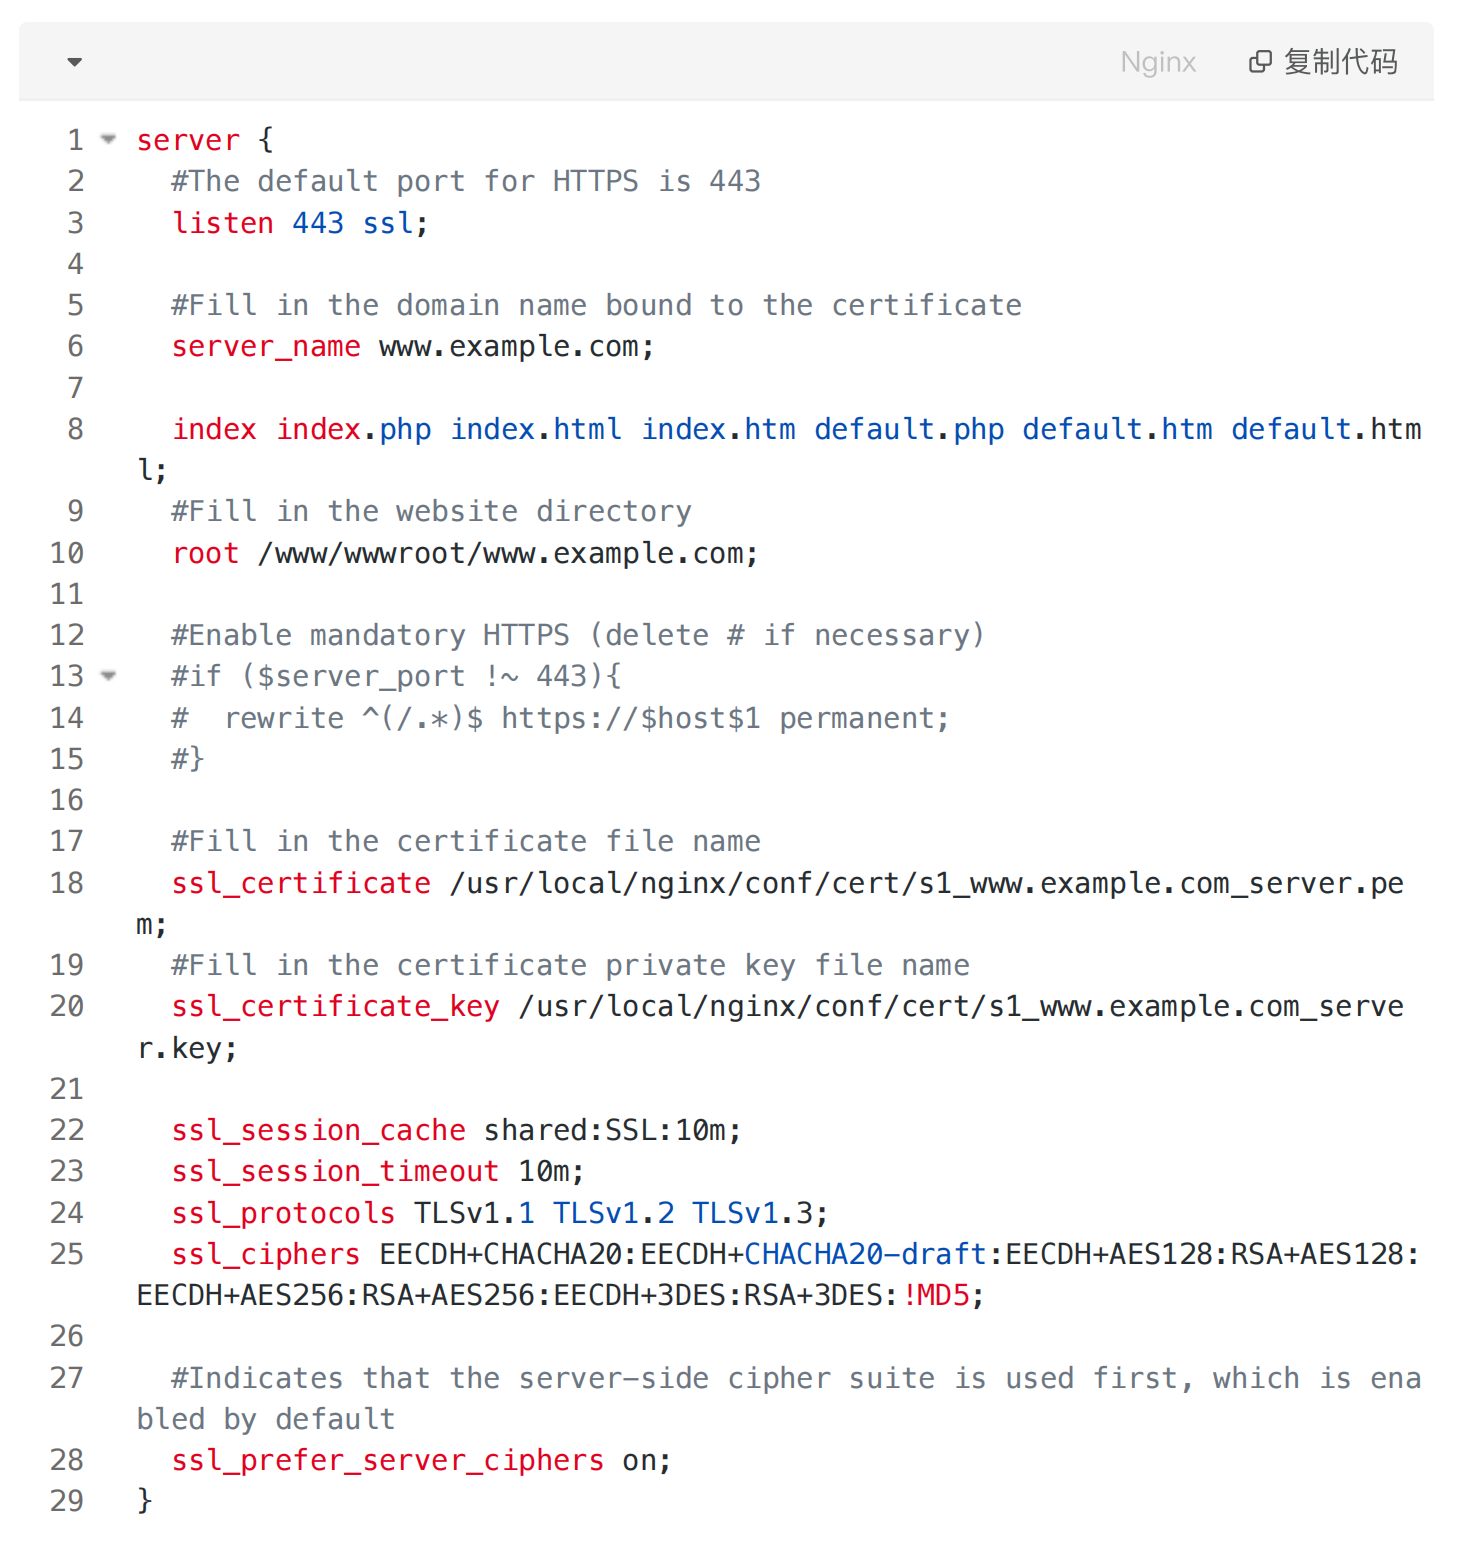
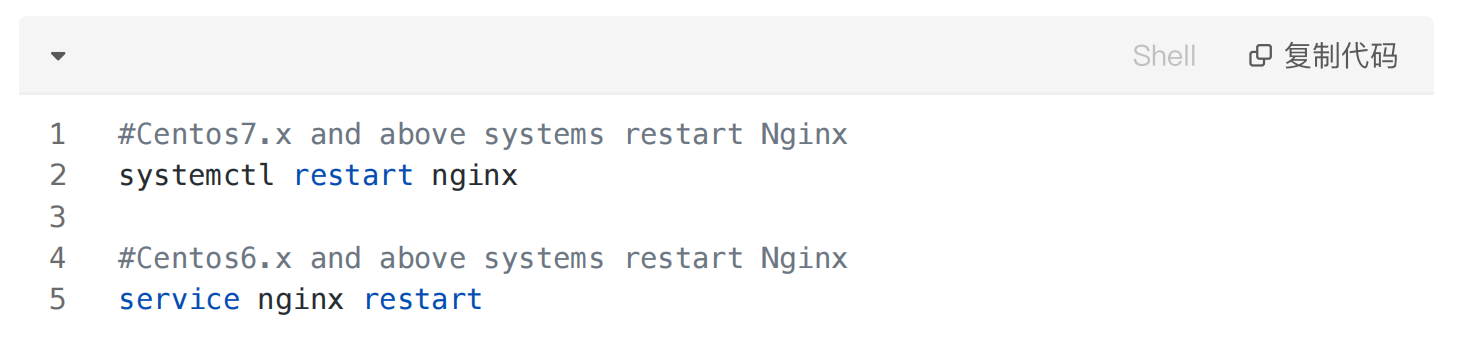
Press the ESC key to exit the editing mode, enter :wq to save and exit, and restart the nginx service.
Notice:
1.The server firewall needs to open port 443. If it is hosted on Amazon, Google Cloud and other service providers, you need to log in to the service provider console to open port 443.
2.Before restarting Nginx, it is recommended to test whether the configuration file is OK. Enter the command nginx -t to test. If /usr/local/nginx/conf/nginx.conf test is successful is displayed, it means that there is no problem with the configuration and you can restart it safely.


支持以下地区货币结算:
AlipayHK (中国香港) : 支持 HKD 结算
TNG eWallet (马来西亚) : 支持 MYR 结算
Boost (马来西亚) : 支持 MYR 结算
GCash Pay (菲律宾) : 支持 PHP 结算
Billease (菲律宾) : 支持 PHP 结算
BPI (菲律宾) : 支持 PHP 结算
DANA Pay (印度尼西亚) : 支持 IDR 结算
Kredivo (印度尼西亚) : 支持 IDR 结算
TrueMoney (泰国) : 支持 THB 结算
Rabbit LINE Pay (泰国) : 支持 THB 结算
K PLUS (泰国) : 支持 THB 结算")